
Hosting tools
Deploy files with SFTP
Configure SSH keys and use SFTP to upload, download, and manage website files securely on your HostRight hosting account.
SFTP lets you transfer website files securely over the same SSH connection used by the HostRight terminal. It is a good option for uploading deployments because authentication uses SSH keys and file transfers are encrypted.
SFTP configuration uses the same account username, server hostname, and authorized SSH key as SSH access. Complete the SSH and chrooted terminal setup first, then use the SFTP command or an SFTP client.
Prepare SSH access
Open Advanced Features in the HostRight Control Panel and select SSH Keys.
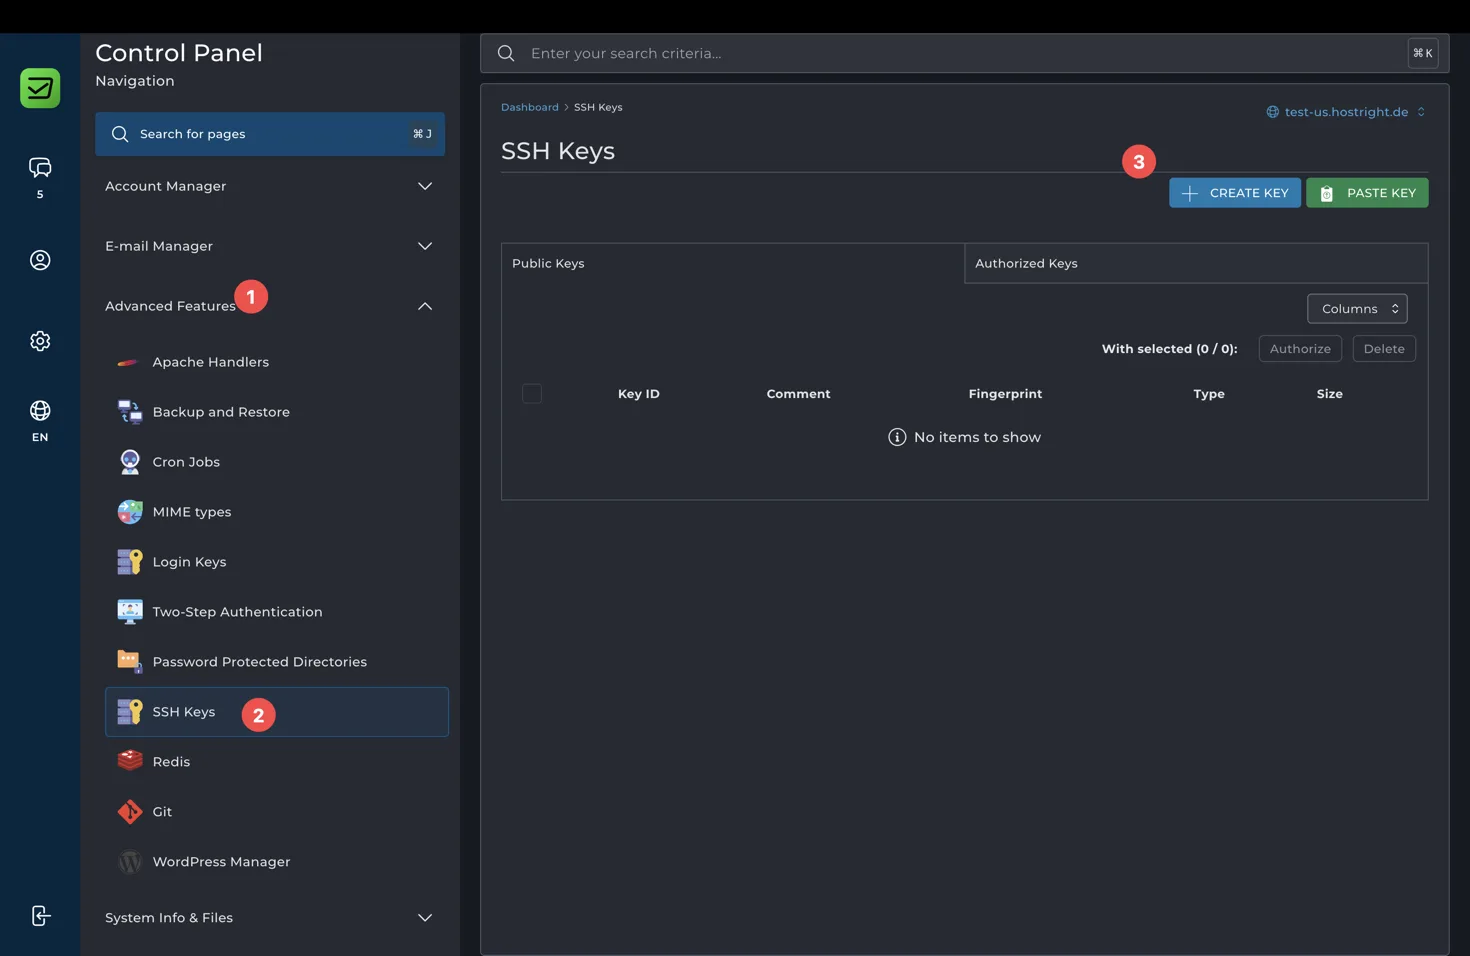
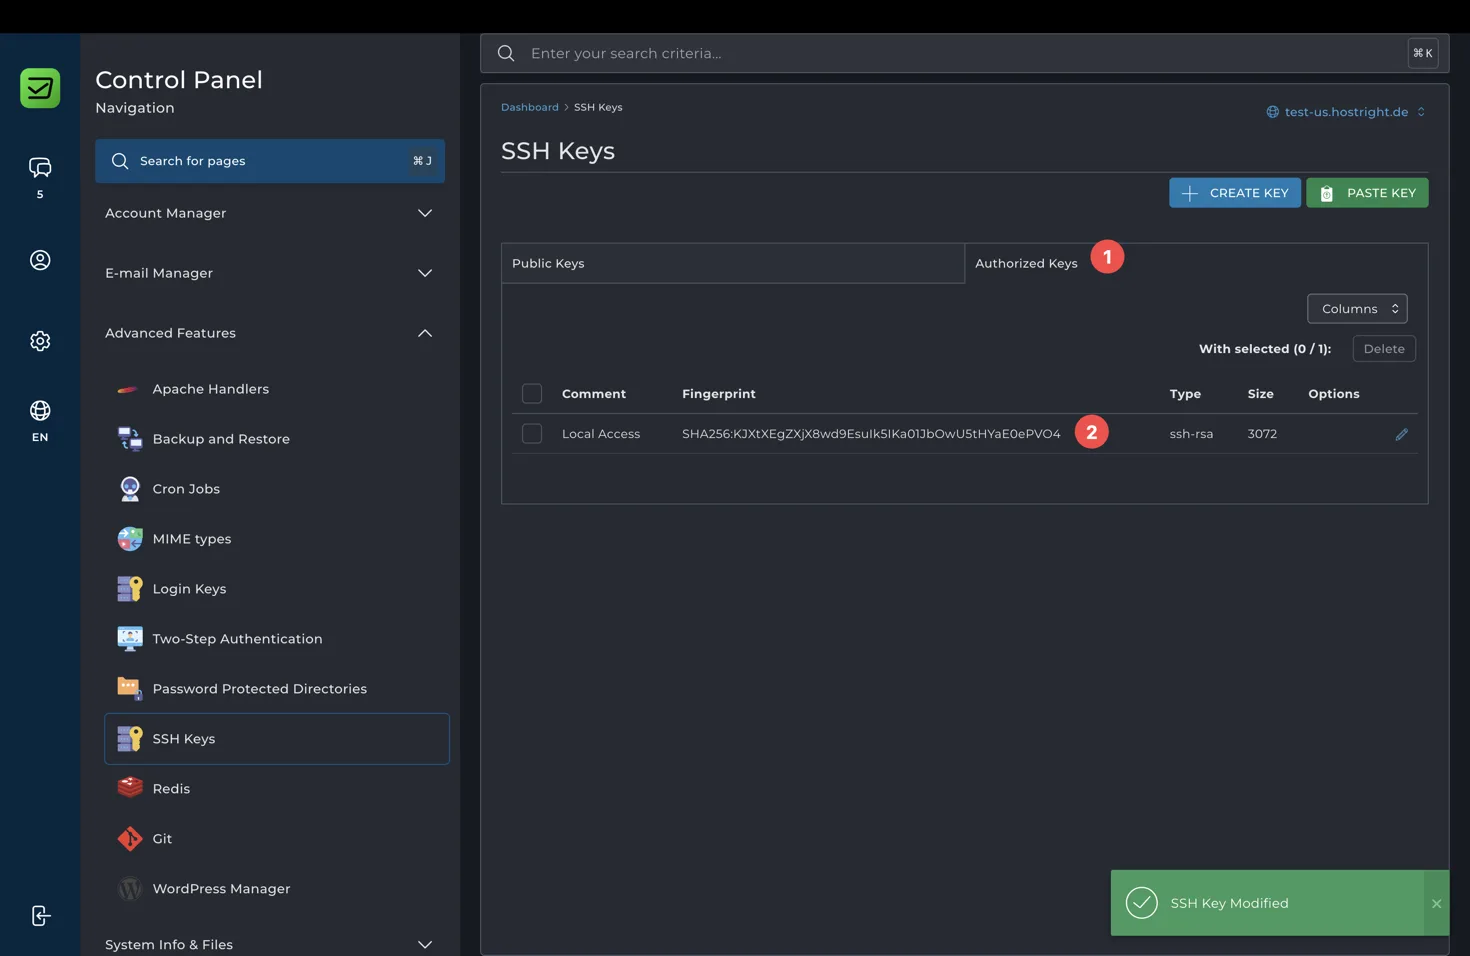
Create a key or paste the public key from your computer. If the key appears under Public Keys, authorize it so it appears under Authorized Keys.
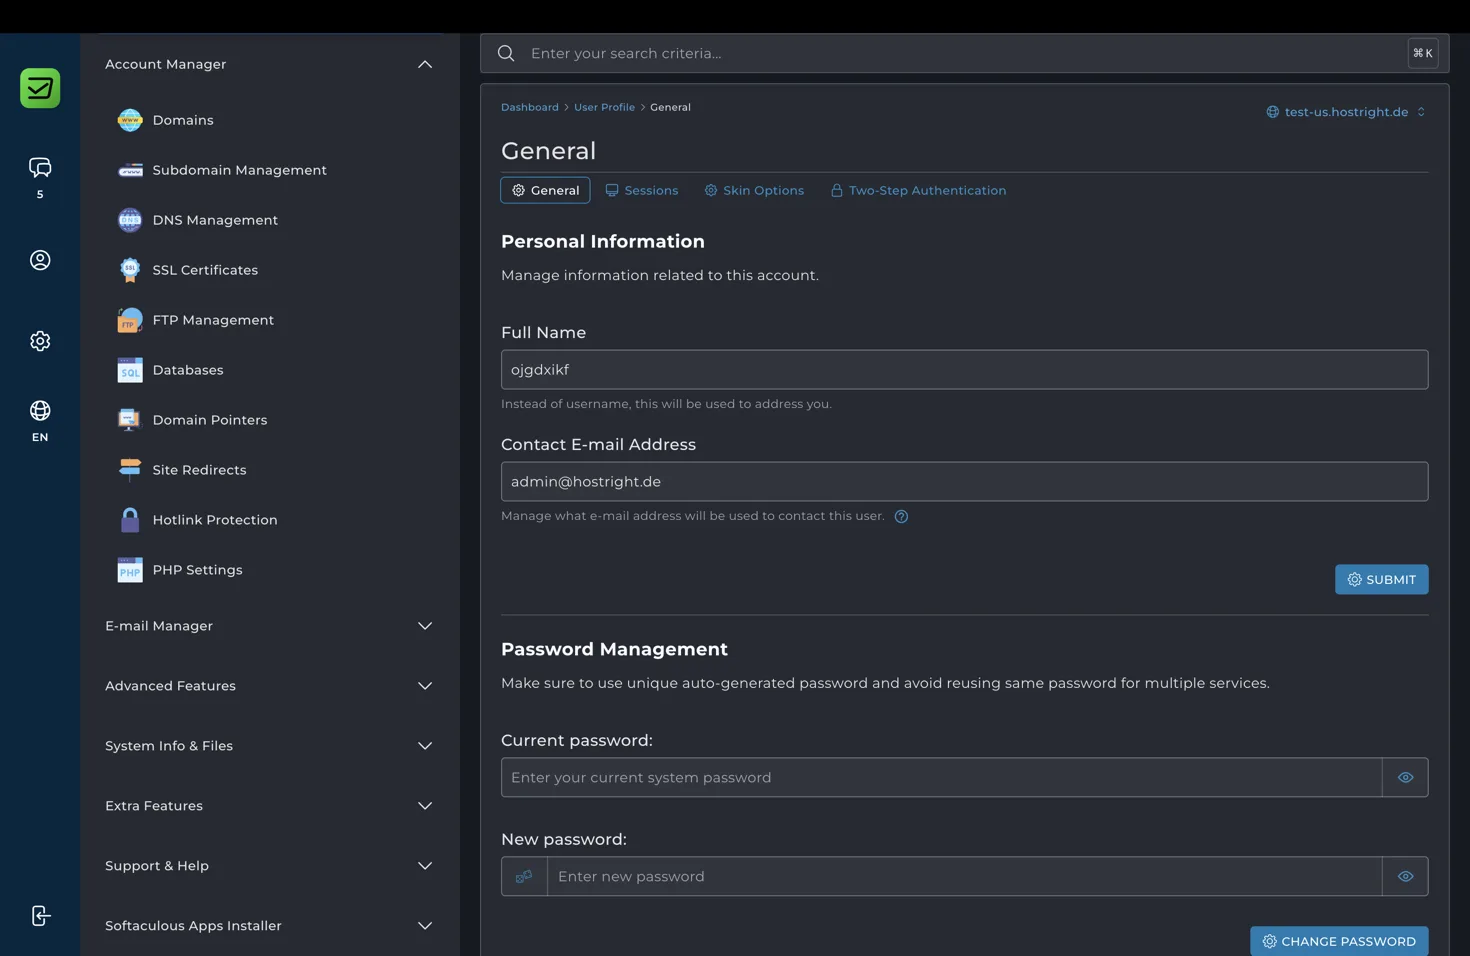
Find the hosting account username in the account profile and confirm the hostname for the hosting service.
Keep the private key on the computer that will run the deployment. Do not upload the private key to the website directory or add it to source control.
Connect with SFTP from a terminal
Run the following command on your computer. Replace the placeholders with your private key, account username, and server hostname.
sftp -i ~/.ssh/id_ed25519 USERNAME@SERVER_HOSTNAME
For example:
sftp -i ~/.ssh/id_ed25519 accountuser@test-us.hostright.de
SFTP normally uses SSH port 22. If HostRight provides a different port for your service, add it with -P:
sftp -P 22 -i ~/.ssh/id_ed25519 USERNAME@SERVER_HOSTNAME
After login, you will see an sftp> prompt. Useful commands include:
pwd                 Show the current remote directory
ls                  List remote files
cd public_html      Open the website directory
lpwd                Show the current local directory
lcd ./build         Change the local directory
put index.html      Upload one file
put -r dist         Upload a directory
get error.log       Download one file
bye                 Close the SFTP session
Upload a website deployment
Build your website locally before opening SFTP. Change to the directory containing the generated files, connect to the hosting account, and open the target website directory.
cd ./dist
sftp -i ~/.ssh/id_ed25519 USERNAME@SERVER_HOSTNAME
Inside SFTP, use cd to open the remote website directory and lcd to select the local build directory. Upload files individually with put or upload a directory with put -r.
cd public_html
put -r .
The exact website directory may be different for an additional domain, subdomain, or application. Use the Control Panel File Manager to confirm the correct destination before uploading a deployment.
Use an SFTP application
You can also use an SFTP application such as Cyberduck, WinSCP, or the SFTP support built into your code editor. Enter these connection details:
- Protocol: SFTP
- Server: your HostRight service hostname
- Port: 22 unless your service specifies another port
- Username: your hosting account username
- Authentication: your SSH private key
Choose the private key file that matches the public key authorized in the Control Panel. Do not select the public .pub file as the private key.
Keep deployments safe
Upload only the built files and required assets. Do not upload .env files, private keys, local dependency folders, or development logs. Keep a backup before replacing an existing deployment, and test the website after the transfer.
If SFTP authentication fails, return to the SSH setup guide and verify the authorized key, username, hostname, private key path, and key permissions. If SSH works with the same values, SFTP should use the same credentials and connection details.